Return to Table of Contents
This page provides guidelines for how to enter & edit content on some specific pages of the website.
- Library jobs for students
- Ask a subject specialist
- Staff profile liaison, service & focus tags
- Bookplates honoring graduating student assistants
- Website image credits
Library jobs for students
Open jobs are pulled onto this page via an RSS feed directly from Handshake. No manual editing by staff is required to add jobs to the page. If there's any problem with the RSS feed, get in touch with Kate.
Ask a subject specialist
This page is intended for users who want to find a specific person to contact or meet with for specialized help. It is one of the options on the more broad Ask Us page. All staff who have a Liaison area or Service or focus checked off in their staff profile will appear on this page.
The page lists:
- Subject liaisons: liaisons to academic departments
- Staff who have a service specialty or focus: Staff with specialized non-subject/discipline based expertise (i.e. media, data, copyright, etc.) who are likely to get questions or meeting requests from users
The page does not list:
- Staff whose primary role is not public-facing
- Staff who provide service in an area where users are more likely to look for information or contact info directly on the webpage about that service (i.e. ILL, reserves, etc.)
To add a staff member to this page, assign them a Liaison area or Service or focus in their staff profile. Read more about Staff profiles.
Staff profile liaison, service & focus tags
Subject liaisons and staff who have a service specialty or focus will check off a Liaison area or Service or focus in their staff profile.
These tags:
- Appear on your staff profile
- Add your staff profile to the Connect with a librarian page
- Populate the Subject area & Specialty drop-down menus on the Connect with a librarian page
The list of Liaison area tags reflects the list of AS&E academic departments. However, the tags are not necessarily identical to the department names, but instead reflect the broad discipline so that all users, regardless of if they identify as being part of a specific department, can find a contact person.
- For example, rather than using the department name "History of Art & Architecture", the related liaison area tags are "Art and Art History" and "Architecture"
The list of Service or focus tags reflects broad areas of expertise that liaisons can provide assistance in. Staff who have a service specialty or focus should have 1-3 service or focus tags assigned.
They are terms or short phrases meant to help users understand staff expertise and identify who can help them. They should identify a staff member's unique area of expertise. Terms for service areas that are provided generally by a broad range of staff, such as "instruction", "workshops", or "citation help" should not be used here. Those are better reflected elsewhere on the website as services Tisch Library provides.
To add or edit a term on these lists, please contact the Web Team.
Bookplates honoring graduating student assistants
To add content to the Bookplates honoring graduating student assistants page:
- Navigate to the Bookplates page and click the Edit tab
- Add the year you're adding content for to the bulleted list of years at the top of the page
- Create a new section on the page for the year you're adding content for. Use Heading 2
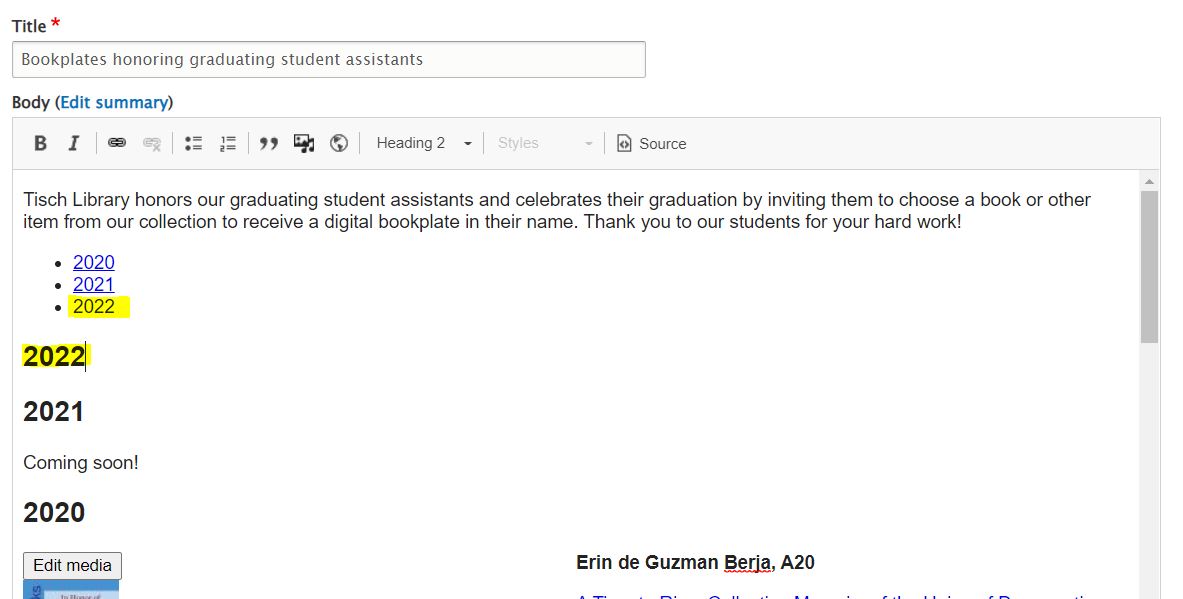
- Using the button in the menu bar at the top of the text editor, switch to Source view and add an anchor to this new section. Follow the html formatting for the other anchors already on the page. For example, if you were creating an anchor for the 2022 section, when you switch to Source view the html would look like this. The lines bolded here are the lines you'll be editing:
<p>Tisch Library honors our graduating student assistants and celebrates their graduation by inviting them to choose a book or other item from our collection to receive a digital bookplate in their name. Thank you to our students for your hard work!</p>
<ul class="anchor">
<li><a href="#2020">2020</a></li>
<li><a href="#2021">2021</a></li>
<li>2022</li>
</ul>
<h2>2022</h2>
To add an anchor, you'll edit the lines in bold to look like this:
<ul class="anchor">
<li><a href="#2020">2020</a></li>
<li><a href="#2021">2021</a></li>
<li><a href="#2022">2022</a></li>
</ul>
<h2 id="2022">2022</h2>
- Once you've made the changes to the html, click the Source button again to return to the formatted view.
- Add a bookplate for each graduating student for the year:
- Enter the student's name & the item that received their bookplate. Follow the formatting for previous year's entries on the page.
- Place your cursor to the left of the line with the student's name, then select the Insert Media button.
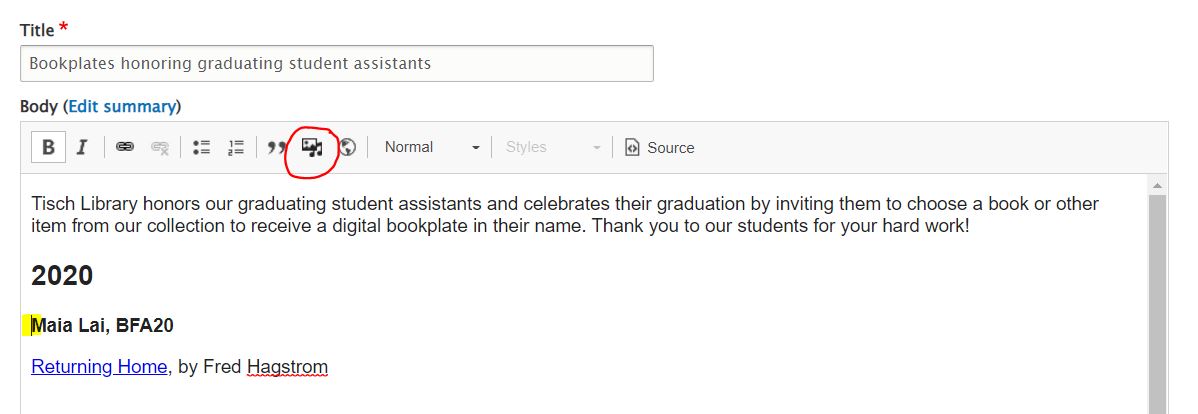
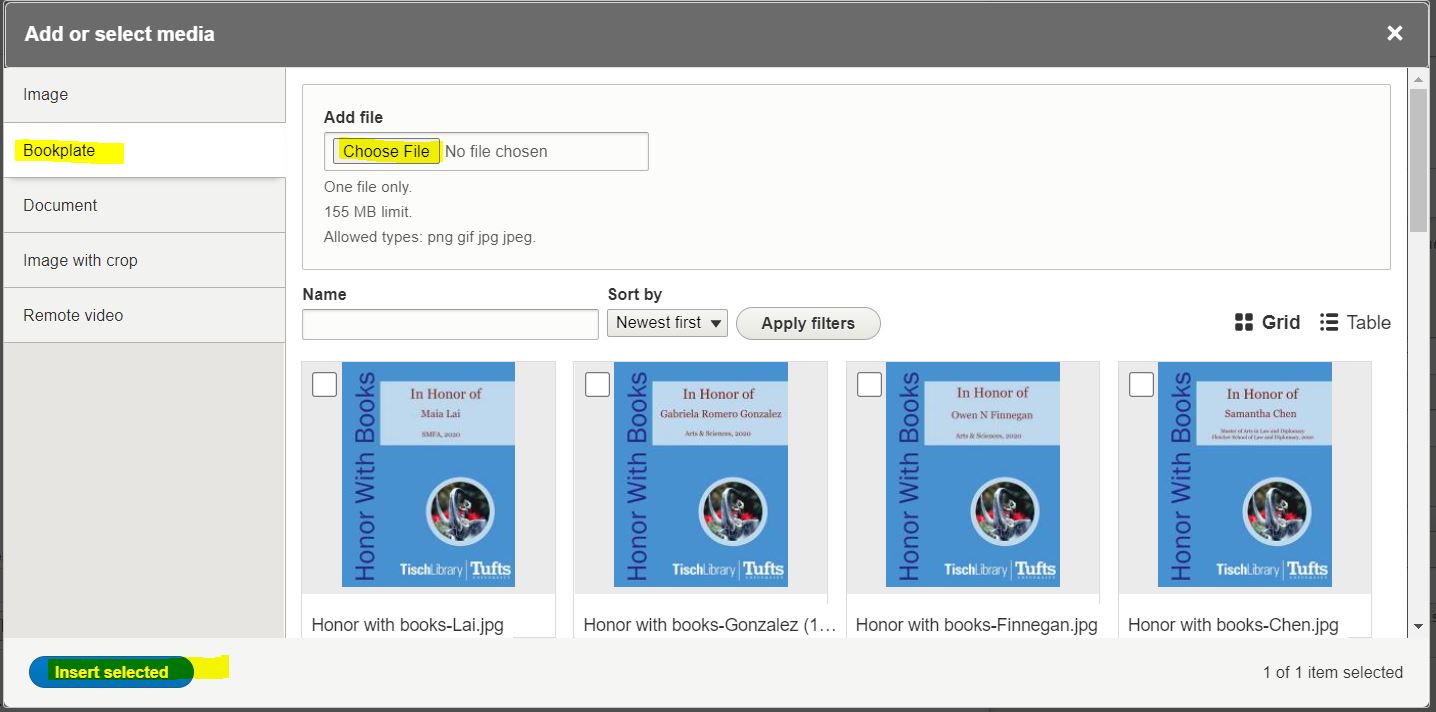
- Choose Bookplate in the menu on the left side of the window.
- Click the Choose File button to upload the bookplate image (or select it from the gallery below if you've already uploaded it).
Click Insert Selected to add your image to the page.
The image will initially be in the middle of the page. To move it to the side of the page so your text appears alongside it, click the Edit media button (highlighted in the image below) and choose Left align. This will move your image to the left side of the page and your text will shift to the right of it.
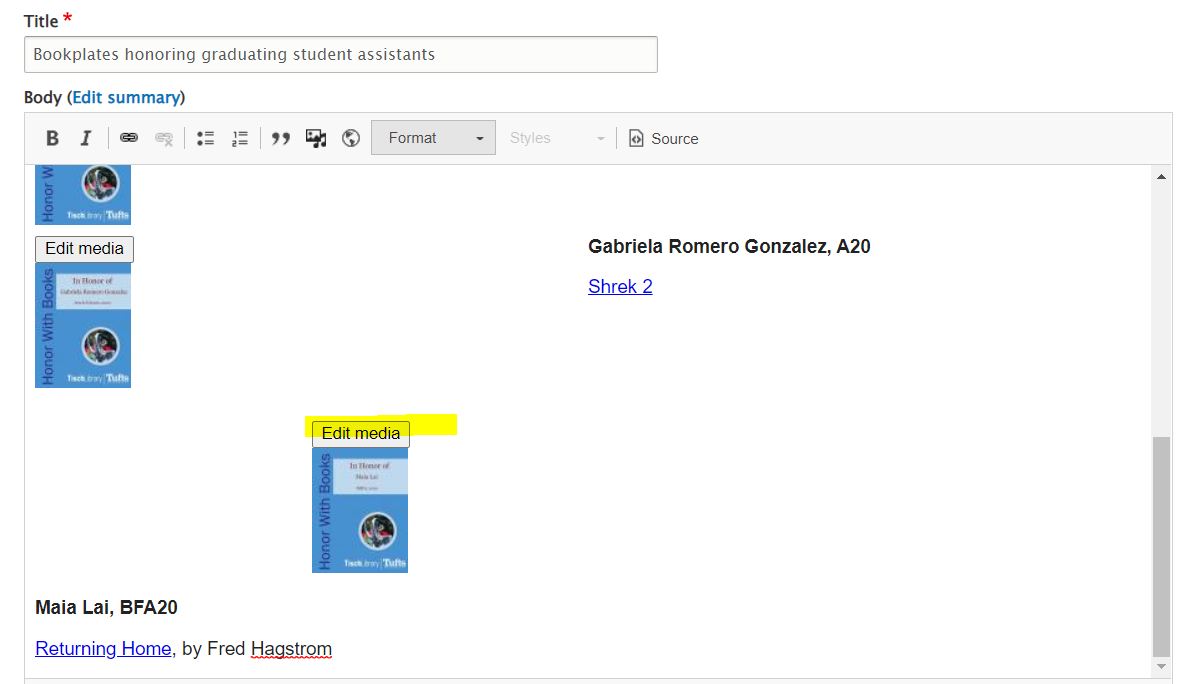
- Move your cursor below the bookplate image and repeat for each student.
Website image credits
If you use an image on a page on the Tisch site that you didn't create, you should provide credit to the photographer. If you don't want to do this directly on the page itself, you can add a photo credit to the Website image credits page. This page is linked from the footer of the website.
If the page you added the image to isn't already listed on the image credits page, add it as a new section and link the heading to the page. Then, add your photo credit info, including a link to the original source if applicable.
Return to Table of Contents