Return to Table of Contents
Return to general information about Adding new content.
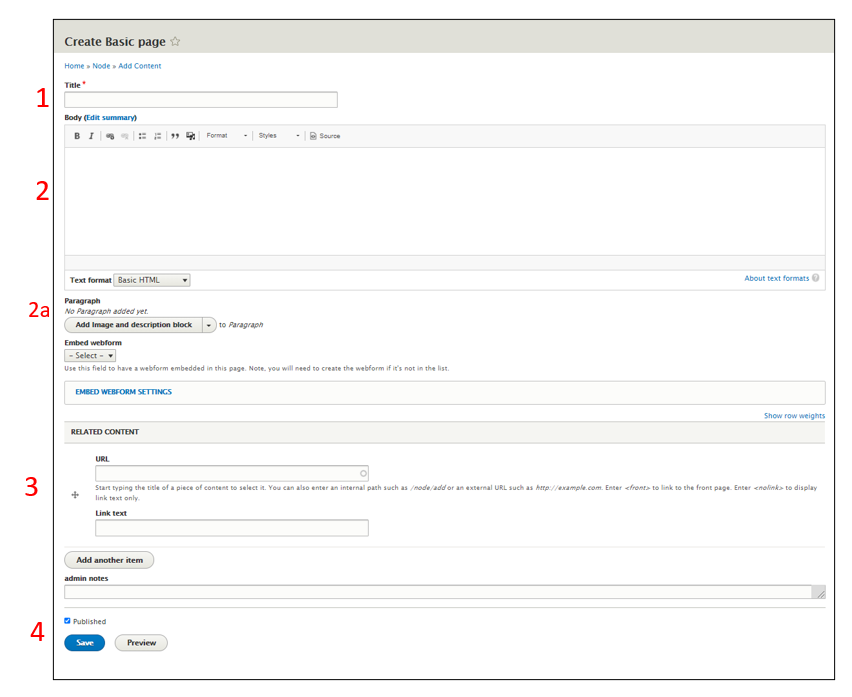
Basic page
Use a basic page for most static content on the site – for example, a page about a service, such as Interlibrary loan (ILLiad) or a page with self-help information for users, such as the page for Faculty & instructors.
See the video tutorial for adding a new basic page.
- Enter a Title for your page
- Enter the Body text of your page
- 2a. You can add additional Paragraphs of different types (image & description, collapsible, icon block) if needed. More information about these is in the Special paragraph types section.
- Add Related Content if appropriate. See the Related content section for more information.
- The Published box at the bottom of the page will be checked by default. If you’re ready to publish your page, leave it checked and click Save. If you’d like to save as a draft, uncheck the box before clicking save.
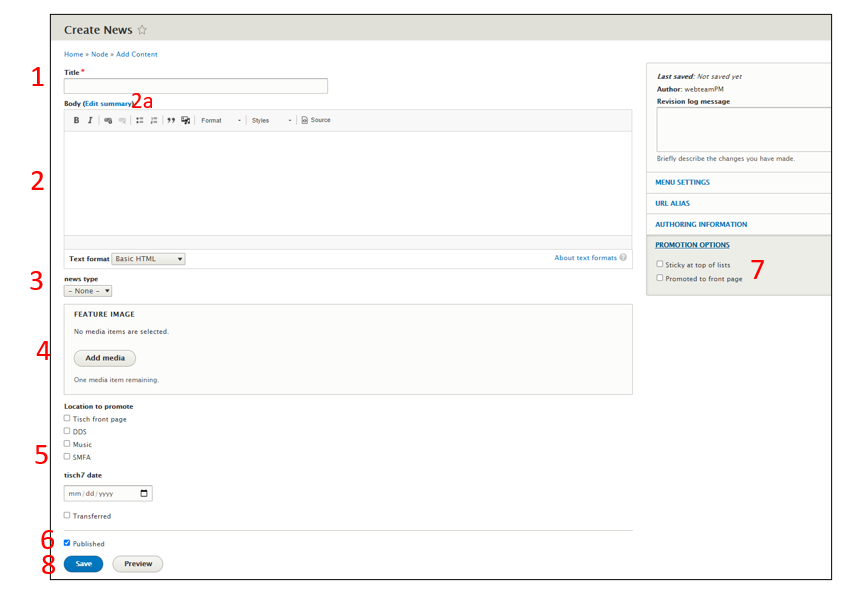
News
Add a new story to the site to highlight new services, events, or news that may be of interest to our community. News story are for timely updates to the community, versus an Explore Tisch feature, which is meant to be a more long-term highlight of a collection, collaboration, project, etc.
News stories can be added to the Tisch homepage in the “News, Workshops & Events” section, and/or to the homepages of the DDS, Music, and SMFA libraries as relevant. They will also appear on the News page in the mega menu.
- Enter a Title for your news story
- Enter the Body text of your news story
- 2a. The site will automatically take a snippet of the beginning of the story to appear in the News, Workshops & Events section on the homepage. If you’d like to edit this snippet, enter your edited text into the Edit summary box
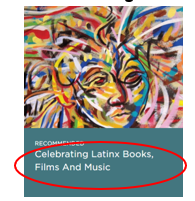
- Choose the news type. On the News page on the Tisch site, Features appear on the left and Updates appear in the smaller column on the right:
- Feature is a story of interest, highlighting something “exciting” about the library, its staff, or users
- Update is information about library operations, used for stories about hours, downtime of a service, etc. These are usually shorter than Features
- If you’ve chosen the Feature type, upload an image to accompany your news story. This will appear on the News landing page and at the bottom of your news story
- Choose the Location to promote. This is the homepage where your news story will appear. You may choose more than one location if your story applies to multiple locations. Typically stories written for a branch location should be promoted to the Tisch page also.
- If you’re ready to publish the story, leave the Published box checked. If you’d like to save as a draft, uncheck the box
- To make the story appear on the homepage in the News, workshops & events section, check Promoted to front page in the “Promotion options” section
- Save your story
Events
Events are entered into the Tisch Library Events calendar in Libcal and automatically ported into the website as Events and promoted to the front page. Note that events may not immediately appear on the website after creation in Libcal, but generally will be brought over overnight. Depending on what time the events are added into LibCal, they may take two days to appear on the website.
Workshops
Workshops are entered into the Tisch Library workshops calendar in Licabl and automatically ported into the website as Workshops and promoted to the front page. Note that workshops may not immediately appear on the website after creation in Libcal, but generally will be brought over overnight. Depending on what time the workshops are added into LibCal, they may take two days to appear on the website.
Select "Digital Design Studio" in the Category field to create workshops that will appear on the DDS page.
Explore Tisch & Exhibits
This content type is used for several related purposes:
- content to highlight in the Explore Tisch Library section of the homepage and in similar sections on the Music, SMFA & DDS homepages. These features spotlight collections, projects, recommendations, student work, etc. and are meant to be of more long-lasting interest (vs. a news story, which are more timely updates)
- creating lists for the Featured Books & Media (“booklists”) section of the site, which appear under the Exhibits menu and also in the Explore Tisch section
- documentation of physical exhibits curated or located within Tisch library. This appears on the Exhibits page of the site.
Details for adding:
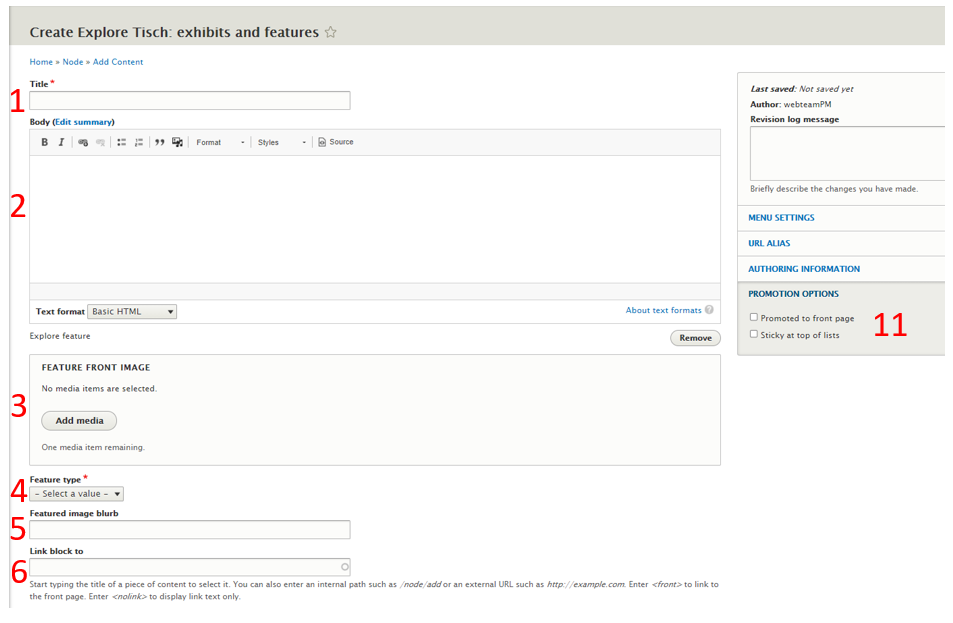
Explore Tisch feature
View the Explore Tisch video tutorial.
(Numbers refer to the screenshot underneath the Exhibits section below)
- Enter a Title for your feature
- Enter the narrative text of your feature.
- If you’d like to use special paragraph types, see #7
- If you'd like to link your feature directly to another page on the site without writing content here, see #6
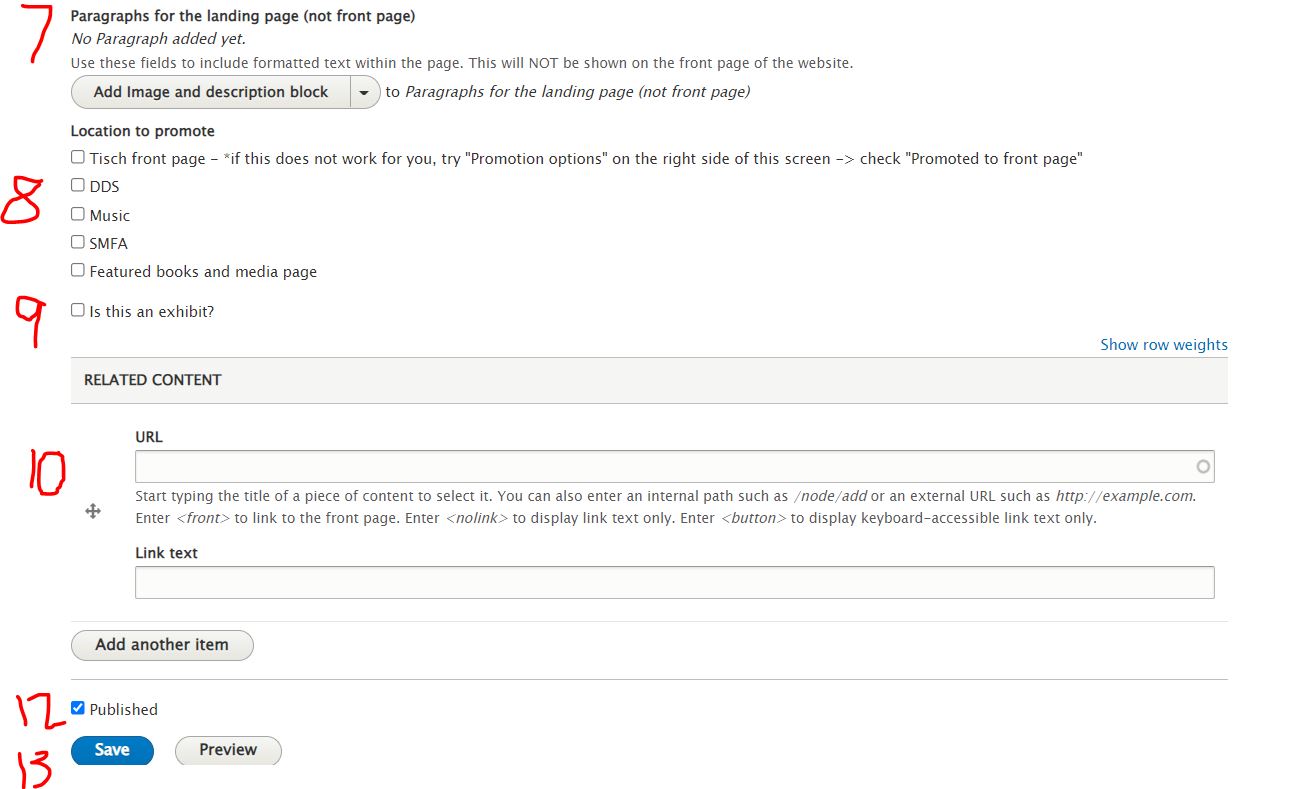
- Add a Featured Front Image to the feature. This will be the cover image when the feature appears in the Explore Tisch section
- Select the Feature Type that best describes what you’re highlighting. This will appear on the homepage above the title of your feature (see the Explore Tisch section on the homepage for examples)
- Collection: a feature describing a physical or electronic collection of material
- New item: a highlight of a new item or items in Tisch’s collection
- Student work: a highlight of student projects that used library material, that are on display in the library, etc.
- Exhibit: Used to enter an exhibit into the “Current & upcoming exhibits” page, and/or to highlight the exhibit in the Explore Tisch section
- Recommended: Used to create a Featured books & media list, and/or to highlight the list in the Explore Tisch section
- Highlight: a general feature that doesn’t fit into any of the more specific categories
- Collaboration: a story about the library working together with faculty, students, staff, etc.
- By default, the title of your feature will appear in the Explore Tisch block on the homepage. If you’d like something other than the title to appear, enter it in Featured image blurb
- If you’d like your feature to link directly to an existing page on the site, or on another Tufts platform like the Tufts Digital Library, enter that link in Link block to. When a user clicks on your feature from the homepage, they will be taken directly to that page. If you choose this option, don’t enter body text in #2 above.
- In addition to the main Body paragraph, you can add additional Paragraph types to your page. See the Special paragraph types section for more details about these options.
- Choose the Location to promote. Your feature will appear in the “Explore” section of whichever homepages you choose. You may choose more than one. Typically a feature for a branch location should be promoted to the Tisch page also.
- Ignore this for Explore Tisch
- Add Related Content if applicable
- To make the feature appear on the homepage in the Explore Tisch section, check Promoted to front page in the “Promotion options” section
- If you’re ready to publish the feature, leave the Published box checked. If you’d like to save as a draft, uncheck the box
- Save your feature
Featured books & media ("booklists")
View the Featured books & media video tutorial.
(Numbers refer to the screenshot underneath the Exhibits section below)
- Enter a title for your list
- Enter any narrative text in the Body you’d like to appear at the top of the page above your list. Normally this would be an explanation of the theme of the list and any additional information you’d like to provide.
- Add a Featured Front Image to the list. This will be the cover image when the list appears in the Explore Tisch section
- Select “Recommended” from the Feature Type dropdown list
- By default, the title of your list will appear on the Featured books & media page & the Explore Tisch block on the homepage. If you’d like something other than the title to appear, enter it in Featured image blurb

- The Link block to field isn't used for Featured books & media
- Choose “Add list of recommendations” from the Paragraphs to add your list of recommendations. See Adding an item to a list of recommendations below for details on adding items here.
- Note that if you don't plan to fill in most of the information to this Paragraph type, especially including the image and description, the display may appear strange. If you'd like to make a short, text-only booklist, consider entering it directly in the Body in #2 above. See the A teach-in: Readings on struggle, resistance and resilience list for an example of this.
- Note that you can also create auto recommendation paragraphs that automatically move content from the library catalog to a highlights and exhibits page using an ISBN number.
- Choose the Location to promote. Choose “Featured books & media page” to have your list appear on that page. If you’d like your list to also appear in the “Explore” section of the Tisch or a branch library homepage, select that location here as well. You may choose more than one. Typically a list for a branch location should be promoted to the Tisch page also.
- Ignore this for Featured books & media
- Add Related Content if applicable
- To make the list appear on the homepage in the Explore Tisch section, check Promoted to front page in the “Promotion options” section
- If you’re ready to publish the list, leave the Published box checked. If you’d like to save as a draft, uncheck the box
- Save your list
Adding an item to a list of recommendations (detail for #7 above)
If you want to group items on the list together under sections (for example, a section for books and a section for videos), enter a Section heading. This can be blank if you don’t want to use headings.
Then, for each item in that section, enter the following information. Note that only the title is required:
- Add an image of a Cover or poster to your item
- Enter the Title of your item
- Enter the Author/creator of your item
- Enter a citation for your item
- Enter a free-text Description/recommendation for your item
- Enter a Link to your item. You can include up to two links for each item. These may be a link directly to an ebook, a link to the catalog record for the ebook, a link to the print book, etc.
- Enter descriptive Link text for each URL, so that a screen reader can distinguish between the various links. For example, instead of entering “ebook” enter “TITLE available online through Tisch” or enter “Available at Tisch Library (CALL NUMBER)” instead of “Print”.
- If you're linking directly to an online resource, such as ebook, database, article, or video, use a proxied link to the resource to ensure that off-campus users can access it
- Click Add book/movie/etc recommendation to add more items to your list
If you want to create a new section, add another list of recommendations Paragraph type (step #7 above) and follow these instructions again.
Physical exhibits
- Enter the title for the exhibit
- Enter a textual description of the exhibit in the Body. You might also add images here. A snippet of this description will appear with the exhibit on the Exhibits page.
- Add a Featured Front Image to the list. This image will appear with the listing for the exhibit on the Exhibits page
- Select “Exhibit” from the Feature Type dropdown list
- Featured image blurb isn't used for Exhibits
- The Link block to field isn't used for Exhibits
- In addition to the main Body paragraph, you can add additional Paragraph types to your page. See the Special paragraph types section for more details about these options.
- Image and description block may be especially useful for visual exhibit content
- Choose the Location to promote. This will place your exhibit into the "Explore" section of the Tisch or a branch library homepage. Typically an exhibit for a branch location should be promoted to the Tisch page also.
- Check the Is this an exhibit box. An additional set of fields will open up
- Fill in the Dates of Exhibit
- Enter the location of the exhibit, if applicable
- Enter the name or the person or group who curated the exhibit in Curated by, if applicable
- Check off Current or upcoming if your exhibit is currently taking place or will be taking place in the future. Uncheck this box when the exhibit has been taken down.
- Add Related Content if applicable
- To make the list appear on the homepage in the Explore Tisch section, check Promoted to front page in the “Promotion options” section
- If you’re ready to publish the list, leave the Published box checked. If you’d like to save as a draft, uncheck the box
- Save your list
Subject guides
Subject guides on the Tisch website are a platform to share up to 3 recommended disciplinary resources with students who are at beginning stages of research, and to link out to more in-depth LibGuides for students who are more advanced in their research skills.
View the subject guides video tutorial.
To change the liaison associated with a guide:
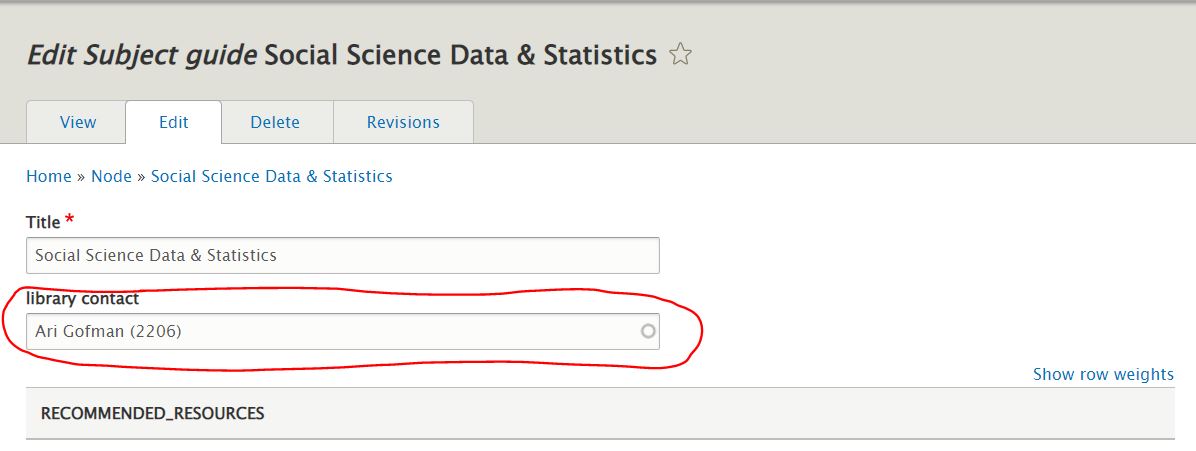
- Find the subject guide you want to edit, either by navigating to it directly and clicking the Edit tab at the top of the guide, or browsing for it in the Content section of the site.
- Find the library contact field at the top of the page. Remove any name already in the field, and start typing the name of the staff member who should be assigned to the guide. As you type, their name should appear in a drop down menu.
- Click the name and save the page.
To edit subject guides:
Recommended resources. This is where you can add top/recommended resources for the subject. You can add either: a Tisch-owned database, or a URL to an external resource.
To add a database or URL:
Adding a database:
Select Add Recommended database. Begin typing the name of the database you’d like added to the Top Resources area. The database will display from a pre-populated list. Select the database from this list. You will have the option to add a custom description for this database. If you choose not to add a custom description, the default description for the database will be displayed. 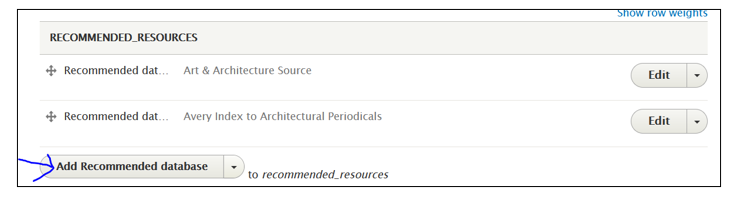
Adding an external URL:
Select the dropdown arrow next to Add Recommended database and choose Add Misc link and description. Add the URL and the name of the resource you'd like to include in the Top Resources area. Use the open text area to create a custom description for this resource. 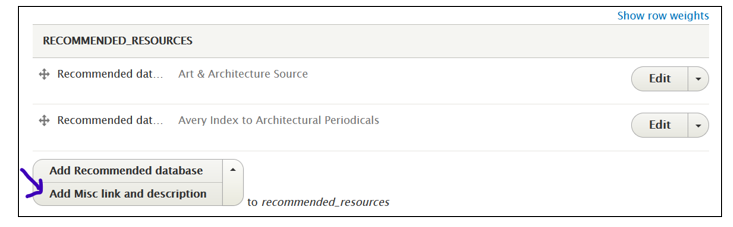
If you're adding a link to an item that's in our collection but not a database (such as a journal, ebook, or video), use a proxied link to ensure that off-campus users can access the resource.
To edit an existing database or URL:
Select Edit, next to the database or URL you’d like to edit. You will be able to change the database or URL and/or edit your custom description. 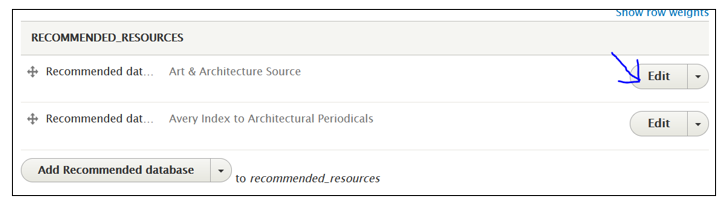
To remove an existing database or URL:
Select the dropdown arrow on the Edit button, next to the database or URL you’d like to remove. Select Remove. 
After you’ve selected Remove, you’ll be asked to confirm the removal. Click Confirm removal if you wish to proceed. If you don’t want to remove the database or URL, click the dropdown arrow next to Confirm removal and select Restore. 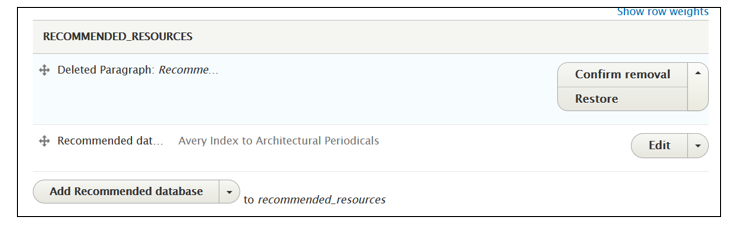
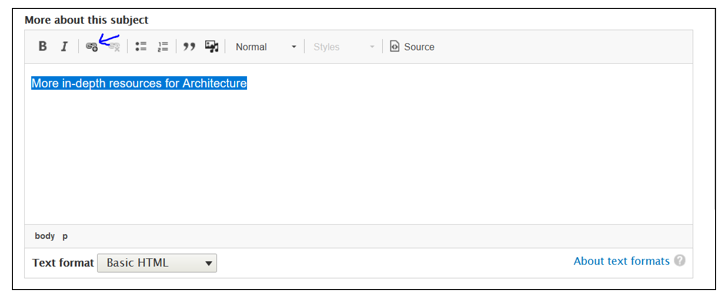
More About this Subject. This is an open text area where you can link to more in-depth and related LibGuides. Please link directly to the LibGuide you want to feature, and not to lists of guides.
To create a link to an in-depth or related disciplinary LibGuide:
Write out the text for what you’d like to call the link. Highlight the text you’d like to be linked and click the “add link” button. Add the URL.
Related Course Guides. This is an area where you can add links to any course-connected LibGuides that you’d like to feature for the discipline.
To add a course LibGuide:
Copy/paste the URL to the course LibGuide you want to highlight (in the URL field). Next, write out what you’d like the link to be called (in the Link text field) 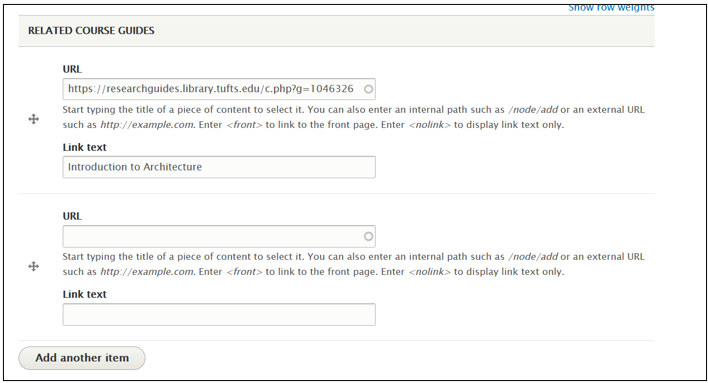
If you’d like to add additional links to course LibGuides, use the Add another item button.
Alerts
An alert is used to provide information to users that visit the Tisch website. An alert can be related to an emergency like the library closing due to inclement weather or can be used to provide more advisory information such as COVID information or a system being down. Most alerts appear at the top of every page of the site and are color-coded based upon the type of alert.
There is also an alert available for the Music Library page. The alert will appear below the header image.
Adding an alert
- Go to the main Content area in the menu bar at the top of page
- Click the blue ‘Add content’ button
- Click ‘Alert’
- Fill in the fields on the page
- Title: This is the title of the alert. It will appear in bold at the top of the alert
- Body: This is the text of the alert. It will appear below the title. You can format the text, include links, etc. Please be concise when creating your alert text.
- Alert type: Choose the type of alert you wish to use. This field determines the colors of the alert. The options are:
- Critical (use this for emergency situations, library closing due to inclement weather, etc.). Red.
- Informational (use for advisory information). Yellow.
- Misc (use if there is already an Informational alert, and you need another alert. For example, if there is a long-term Covid Informational alert, and you need an alert about a service, etc.). Orange.
- Music (this alert should only be used by Music Library staff). Light blue.
- If you'd like to set the alert to publish and/or unpublish automatically at a set time, open the Scheduling Options menu box on the right side of the page. You can enter a date and time to have the alert automatically be published, and/or a date and time to have the alert automatically be unpublished.
- Open the Promotion Options menu box on the right side of the page and check off "Promoted to front page"
Editing an alert
- Go to the main Content page
- In the drop-down for “Content type” choose alert and click the filter button. This will bring up all the available alerts.
- Find the alert you want and click on the Edit button on the right-hand side
- Edit your alert and save. (Note: the preview button will not display the alert at the top of the page but will instead display the text of the alert on the page)
Alert examples
Critical alert:

Informational alert:

Music alert:

Hours
For information about hours, visit the Adding & editing hours on the Tisch site page of the documentation manual.
Staff
More about adding a staff profile here, and specifically about the cropping a staff image here.
Return to general information about adding content
Return to Table of Contents